

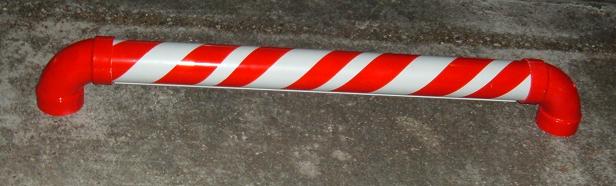
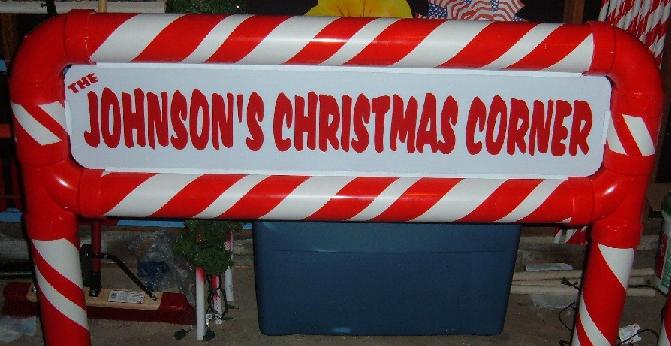
Display Sign
Our big display sign has gotten a lot of attention over the years. Here’s how you can make your own:

Supplies Needed:
10 foot length of 4” PVC tube/pipe (NOTE: This is simply for the sign, not for the legs that it stands on. For my sign I have it on 8′ legs, which requires two additional 10 foot lengths of 4″ PVC).
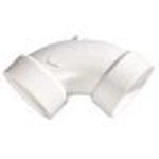
4” PVC 90 degree corner pieces- Qty of 2
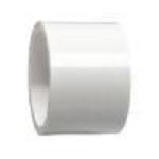
4” PVC Coupling- Qty of 2
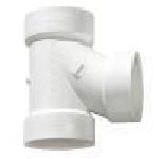
4″ PVC Sanitary T- Qty of 2
Aluminum Track (normally used for 1/4″ plywood 48″ lengths)
3M Blue Painters Tape
1 can of plastic spray paint (fire engine red works the best) (NOTE: You’ll need more if you made 8′ legs for your sign.)
1 can of metal spray paint (white enamel)
Sandpaper (fine)
PVC Cement
Krazy Glue
Coroplast sheet (depending upon how big you need the sign to be. I get 4′ x 8′ sheet because I can use it for other projects).
ASSEMBLY:
1. Sand any lettering and/or marks off of the pieces.
2. Cut 10 foot PVC into 5 pieces:
– Qty of two four foot pieces (total of 8′)
– Qty of four six inch pieces (total of 2′)
3. Spray paint 90 degree corners, Sanitary T’s, and the four 6″ pieces solid red. Allow to dry.
4. Wrap the 4 foot pieces, and the 4″ couplings in “candy cane” style with the blue painters tape (optional: use three inch tape AND1½” tape to create different width lines-looks much better on the large pieces). Spray paint the pieces. Allow to dry, and then peel off the tape.
5. Take your 4′ aluminum tracking and saw 3 1/2″ off each one. Spray paint with the white enamel. You should now have two that are 44 1/2″ long and two pieces that are 3 1/2″ long. Allow these to dry (important as you will be handling these).
6. Place Sanitary T’s on the end of one of the 4′ pieces. PVC cement the whole thing together.
7. Place 90 degree corners on the end of the other 4′ pieces. PVC cement the whole thing together.
8. Place red 6″ pieces into both ends of the couplings. PVC cement these together. PVC cement each of these pieces into tops of the Sanitary T’s.
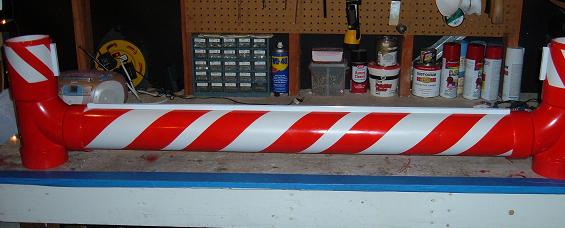
You now have two pieces that each look like this:
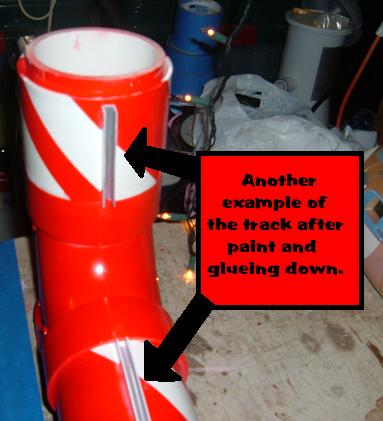
9. Take your 44 1/2″ aluminum piece and Krazy Glue onto the top of the bottom piece and to the bottom of the top piece:
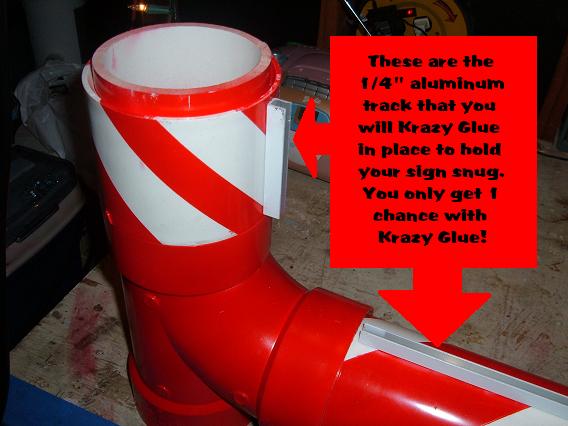
Also, Krazy Glue the smaller 3 1/2″ aluminum track pieces to the couplings:
10. Now feed your sign into the track, cut as necessary to fit perfectly:
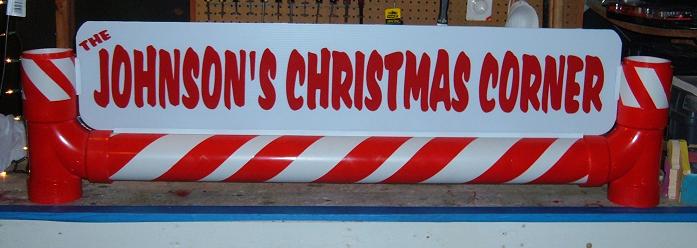
and then put the top on…
11. Place your sign onto whatever size/types of legs that you decide.
You’re Done!
Set up in your display:
1. Dig two holes 1 foot deep where your large arch will be placed (use a post hole digger to make this easier if you choose).
2. Place your large arch at end of your lighted garland arches.
3. Hammer into the ground and pack dirt around.
Optional step(s):
– At the bottom of each leg/upright you can drill a large hole and use the large arch to run wire, extension cords, etc from one side of a yard into another (keeps cords off of sidewalks).
– You can make your sign however you choose. I made mine on Word with the font and size I wanted. Then I had a sign shop make me the sign at the size I wanted.
– You can make the sign any size you like as well. Simply change the length/height of tubes.
– You can light your sign easily by running white ropes around the back edge of your coroplast sign. This will create a backlit effect. You can also drill/poke holes in your sign and make it light up with minis.
Have fun with these! Good luck!